Some EA games require Secure Boot, a Windows 10 and Windows 11 security feature that ensures your PC only loads safe software during startup.
Secure Boot allows games supported by EA Javelin Anticheat to detect and remove bad actors, resulting in fewer cheaters and a better experience for players.
On Windows 10 and Windows 11:
Heads-up: This article is a general guide, but it might not follow the exact steps of your PC.
If you’re not used to navigating to and updating your BIOS settings, you should contact a professional or your manufacturer’s customer support. Incorrectly configuring BIOS settings can cause issues with your computer, including failure to start up.
We highly recommend that you read your computer or motherboard manufacturer's support resources before updating any BIOS settings. EA doesn’t take responsibility for changes to your BIOS settings.
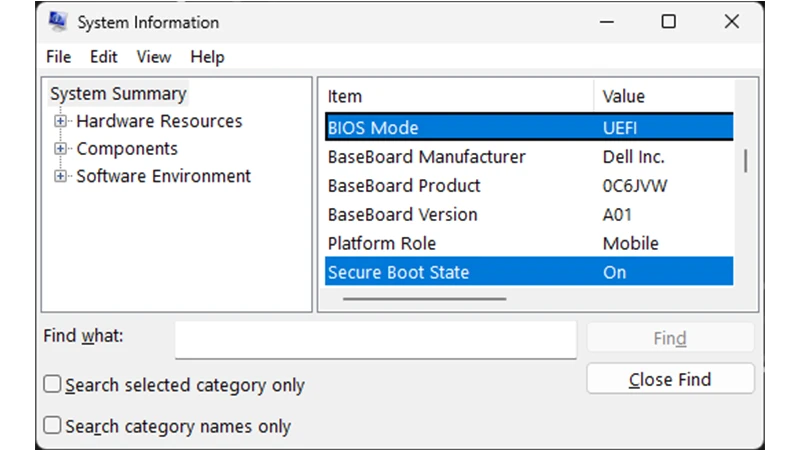
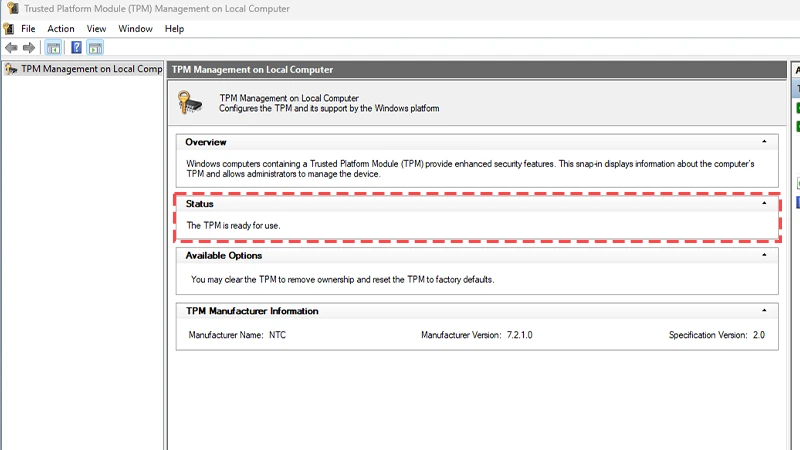
Let’s check if Secure Boot’s requirement, TPM 2.0 is turned on and make sure the Windows disk is GPT and not MBR. You can jump straight to enabling Secure Boot if you’ve already done these steps.
Remember—every manufacturer is different, and if at any point when following the steps in this article your PC doesn’t match our instructions, you should refer back to your manufacturer's support resources. Here are links to some of the various manufacturers' guides:
Manufacturer | General Support | Secure Boot | TPM 2.0 | UEFI BIOS |
Acer | ||||
Alienware (Dell) | ||||
ASUS | ||||
ASRock | ||||
Corsair | ||||
Dell | ||||
Gigabyte | ||||
HP | ||||
Lenovo | ||||
MSI | ||||
Omen (HP) | HP PCs – OMEN BIOS setup utility information and menu options | HP® Support | |||
1. Select the Windows key and X at the same time, then choose Disk Management.
2. Find the disc that says OSDisk(C:), and right-click the left column, then select Properties.
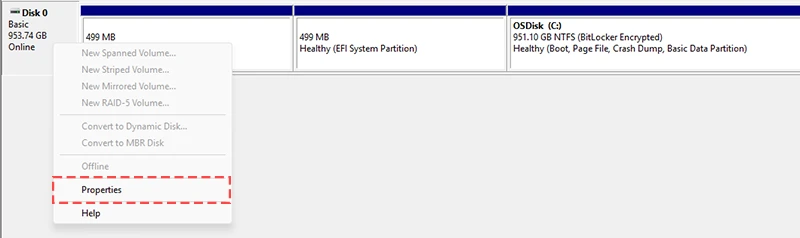
3. In the resulting Properties Window, select the Volumes tab.
4. Find Partition style.
5. Select Windows and R, then type cmd and hit Ctrl + Shift + Enter to open an administrative command prompt.
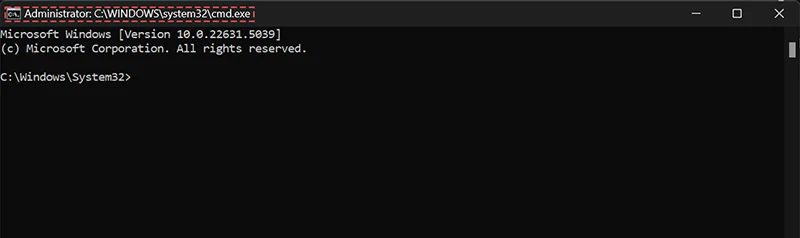
6. In the same administrative command prompt, type mbr2gpt /convert /disk:0 /allowfullOS and select Enter.
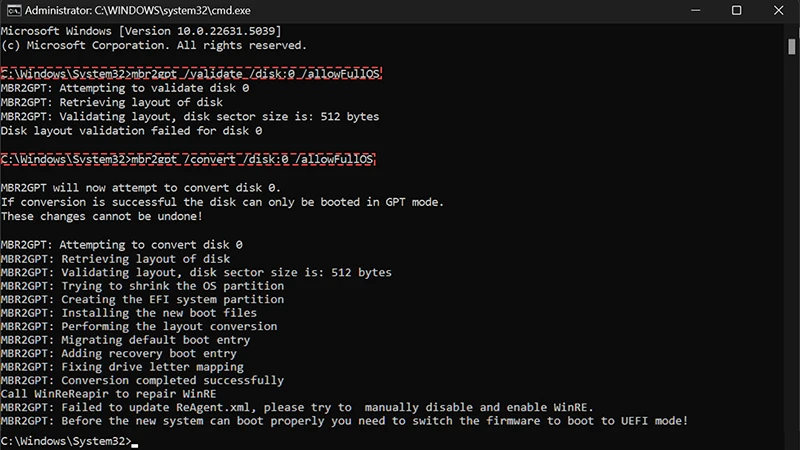
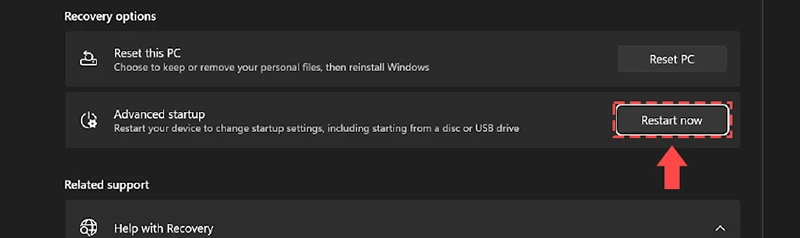
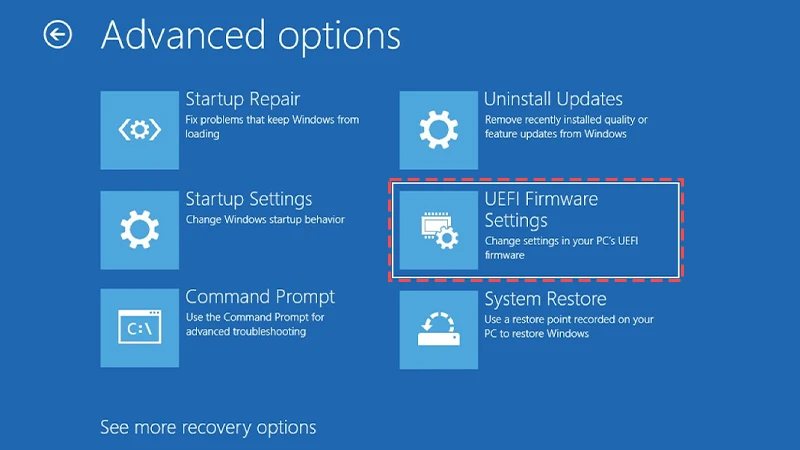
You might be required to switch the Firmware to boot to UEFI mode. Usually, this can be done through the BIOS Settings. Refer to your computer’s brand or manufacturer’s support resources for detailed instructions if you need to switch your Firmware Settings.
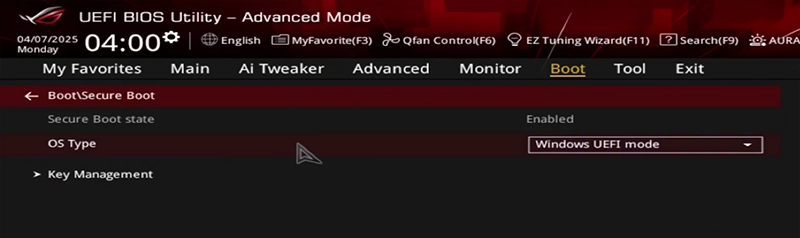
Now that if your Windows disk is set to GPT and your BIOS is set to UEFI, you’re ready to enable Secure Boot.
Before following these steps, make sure both the TPM 2.0 and UEFI are requirements have been successfully enabled.
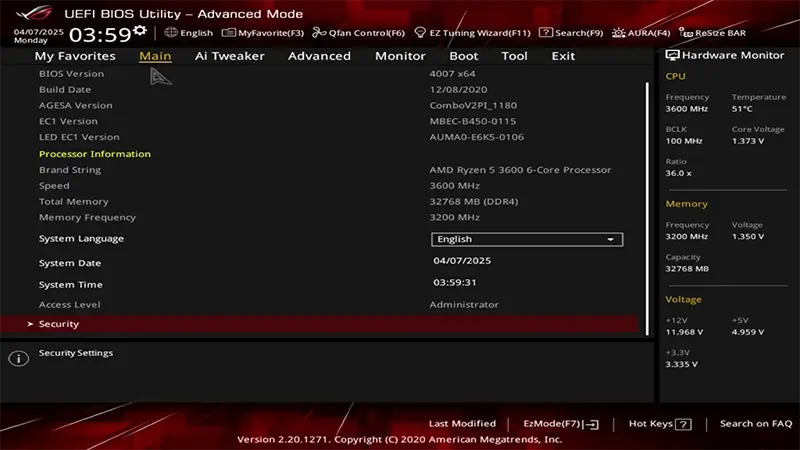
Remember—the BIOS menus for different brands and motherboard manufacturers can differ from those pictured here, so make sure to refer to your manufacturer’s support resources for specifics.
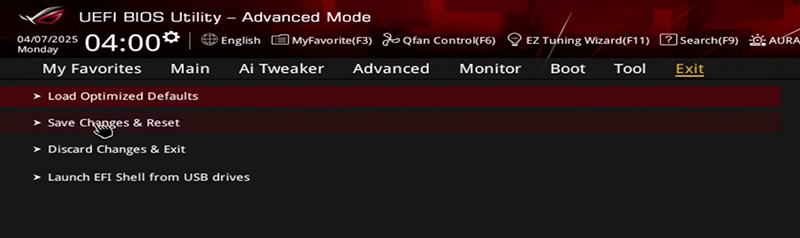
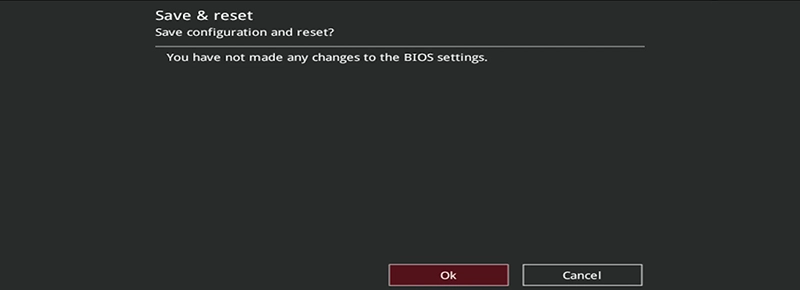
After enabling Secure Boot, try launching your game again. If you’ve successfully enabled Secure Boot and its dependencies you should no longer get a warning asking you to enable the feature. On some versions of Windows an additional restart may be required for the feature to fully enable.


