Battlefield 6’s Portal website lets you create custom experiences or modify existing game modes. Learn how to make your own experience and how to host it when you’re finished.
Battlefield Portal is a space where you can find player-made experiences or design your own by building off existing game modes or creating something completely new.To start using Portal, go to the Portal website and select Create New to build your own experience.
If you haven’t used Portal before, make sure to select Download SDK first. This lets you write code for your experience and make spatial, map, and level edits.
How do I create a Portal Custom experience?
Portal Custom experiences give you an empty template to build from. They’re more customizable than Verified Modes experiences. When you create a Portal Custom experience, you can choose all the factors that create your game. To start creating a Portal Custom experience:
1
Select Create New.
2
Select Portal Custom.
3
Select the default template, then Start Editing.
You can then begin creating your experience.
To begin, go to the Settings tab to pick a Mode and Game Time.
Under the Teams tab, choose your max players, number of teams, and factors like human players, AI players, and squad revive settings. Some modes may limit the number of AI players.
Under the Modifiers tab, choose gameplay modifiers like Soldier, Vehicle, User Interface, and AI settings.
Select restrictions, like excluded classes, weapons, attachments, and gadgets, under the Restrictions tab.
Choose maps under Map Rotation.
Use the Rules Editor to set rules. You can use TypeScript scripting in the Script tab to code your own rules and game logic.
When you’re happy with your experience, select Create New to save your experience.Then, select Submit to Publishing. This makes your experience visible under My Experiences. There’ll be a moderation check before your experience is ready, which can take around three hours.
Now you’ve set up the basics of your experience, you can keep editing it in Godot, which lets you make spatial, level, and map changes. To get started:
Selecting a map will open it in the Godot game engine, where you can edit it. Use the file’s folders to add objects that already appear in a map, move objects on the map, or remove objects. When you’re done editing:
1
Select Scene, then Save Scene As…
2
Save your map under a new name.
3
Select Export Current Level.
4
Next, select Open Exports…
5
Go back to the Portal website and find your experience under Drafts.
6
Select it and choose Modify.
7
Select Map Rotation.
8
Find the map you edited on the right side of the screen, then select the Import button to attach a spatial JSON for this map.
9
Choose the file you edited, then go to the Publish tab and select Save.
To test if your edits work in-game:
1
Select Portal > Browse Server > Locally Host.
2
Go to My Experiences and select the experience you want to test.
3
Choose Host Locally.
You can go back to Godot if you want to make more edits, but make sure to save your experience again.
Portal lobbies are pre-match screens where players can organize into teams, squads, and set specific admin controls. You can set up a portal lobby as part of a Portal Custom experience in Battle Royale (Quads) and Conquest. Other modes don’t support lobbies.
1
Under your experience’s HostingSetup, scroll to Enable Lobby.
2
Make sure Enable Lobby is toggled On.
1
In the Team Creation menu, select Reveal Join Code.
2
When you share this code, other players can find and join this specific lobby.
Spectator mode is a mode you can turn on in a portal lobby for Battle Royale (Quads) and Conquest modes. It lets an audience watch your match.To turn on Spectator mode:
1
In Hosting Setup, make sure Enable Lobby is toggled On.
2
Under Enable Lobby, make sure Allow Spectators is toggled On.
3
Select Host to start the experience.
You can’t change your lobby settings after you’ve hosted your experience and joined the lobby. Make sure your settings are correct before you select Host. If you want to try different settings, you’ll need to create a new lobby.
The mode features several cameras for overseeing the map, watching specific players from a third-or first person perspective, and a scoreboard for keeping track of the top players.Spectators can customize the information they get during a match, like which teams come up in their kill feed or what information they get about players, from their Spectator Options.
1
Select Community from the main menu.
2
Choose Browse Servers.
3
Select Filters.
4
Under General, make sure Custom Lobby is set to Lobby Enabled.
5
Select Apply Filters to search.
How do I create a Verified Modes experience?
You can also create a Verified Modes experience on the Portal website. This lets you edit an existing game mode to suit your preferences. You can’t modify as much as Portal Custom experiences.To start creating a Verified Mode experience:
1
Select Create New.
2
Select Verified Modes.
3
Choose a game mode you want to modify, then select Start Editing.
From there, you can edit certain game features to customize your experience.
Under the Teams tab, choose your max players, number of teams, and factors like human players, AI players, and squad revive settings.
Under the Modifiers tab, choose gameplay modifiers like Soldier, Vehicle, User Interface, and AI settings.
Select restrictions, like excluded classes, weapons, attachments, and gadgets, under the Restrictions tab.
Choose maps under Map Rotation.
When you’re happy with your experience, select Publish. Name and describe your experience, set an image, then select Create New to finish your experience. Need more help? Learn more about creating Verified Modes experiences.
How do I publish my experience?
Creating an experience makes it available to you. When you’re ready to share your experience with other players, select Submit To Publishing. There’ll be a moderation check before your experience is ready, which can take around three hours.
Once you’ve published your experience, it’ll be ready to find in the Portal menu under My Experiences.
If you’ve already submitted your experience for publishing on the Portal website, it’ll be findable in-game. If you haven’t done that yet, follow these steps to host your experience in-game.
1
Go to the Portal menu.
2
Select My Experiences from the tile menu.
3
Select an experience.
4
Choose Host.
If you’ve made a Portal Custom experience, you can choose Host Locally to test it out privately.
5
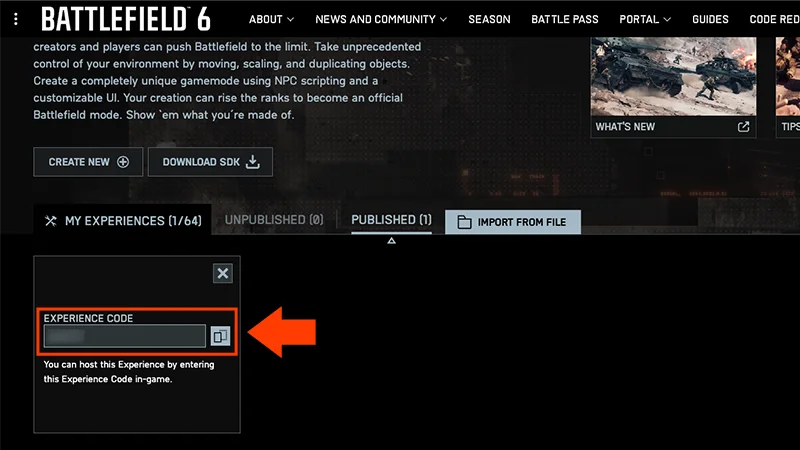
Players can now find your experience by title or experience code.